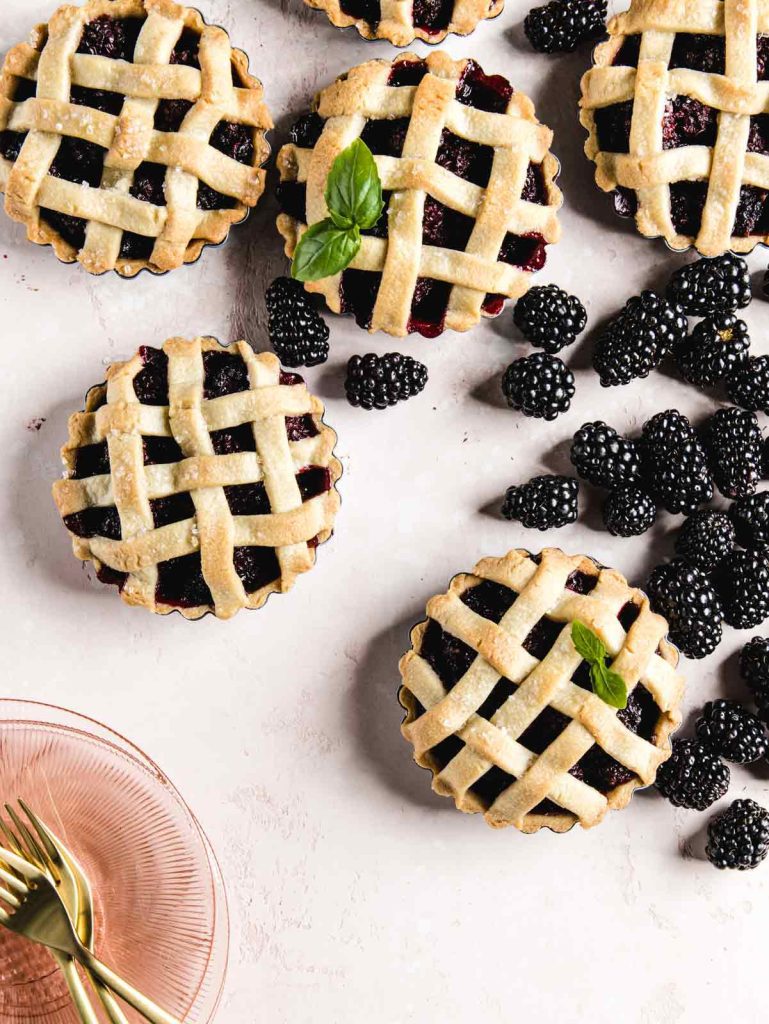
These mini Blackberry Tarts are made with a buttery, oh-so-easy sweet, shortbread cookie-like crust and filled with a tart blackberry filling made from whole blackberries. Use fresh or frozen berries for a slice of summer anytime of the year.
What Makes these Blackberry Tarts?
These blackberry tarts only have two main components: the sweet tart crust and the blackberry filling. Here’s what you’ll need for each:
Sweet Crust Dough
- Unsalted butter
- Granulated and Brown sugar
- Egg
- Vanilla extract
- All-Purpose flour
This sweet crust is officially called pâte sucrée, which means sweet pastry dough in French. It’s so easy to make and not finicky when it comes to baking. I use the food processor to make this, but it can also be done in a mixer. In the food processor, blend together cubes of butter and sugars.
Add in beaten egg and vanilla, then flour. Pulse until a dough comes together. Wrap in plastic wrap and chill for at least 30 minutes or overnight if desired. Dough can also be wrapped and frozen at this time for easy tarts on the go!
Because we have blended the butter and sugar, the texture will be closer to a shortbread cookie when baking, rather than a flaky pie shell. The addition of the eggs helps it to keep its structure and gives the crust stability.
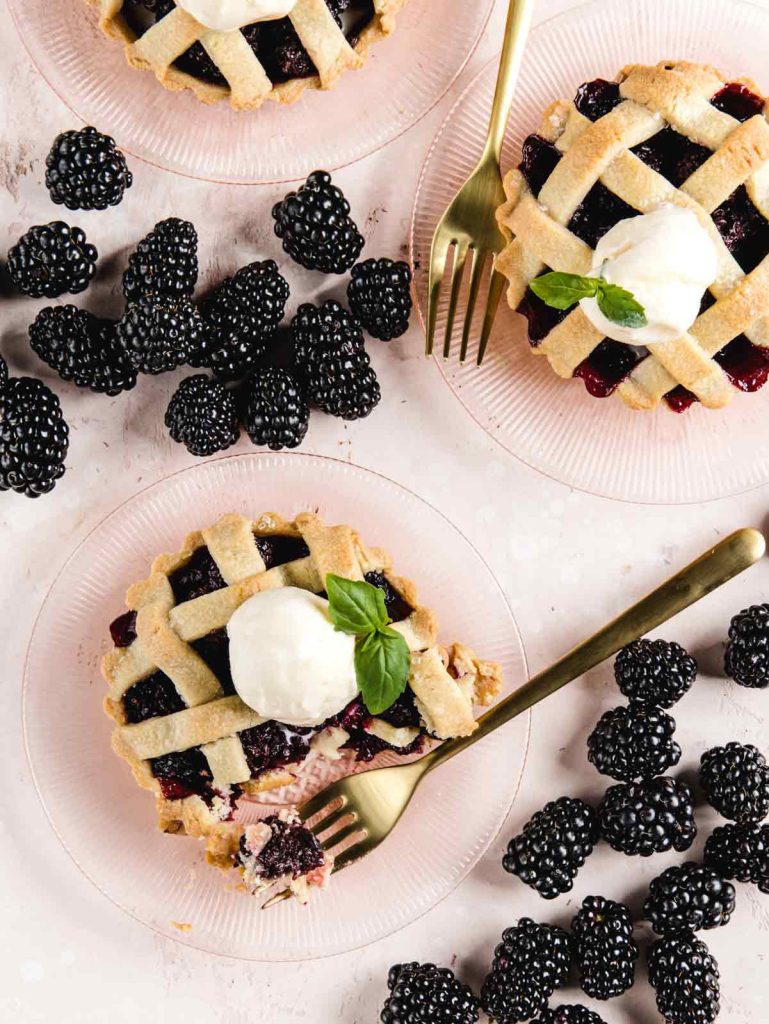
Blackberry Filling
- Blackberries. Fresh or thawed from frozen
- Granulated sugar
- Cinnamon and Nutmeg
- Lemon zest and juice
- Cornstarch
The filling is a pretty traditional fruit filling. While your dough is chilling, mix together all your filling ingredients. Letting the blackberries sit in the sugar will macerate the berries and release the extra unwanted juices, so set in a sieve above a bowl for easier discarding.
I smooshed any really large berries with a fork just so I can have a nice domed shape instead of a knobbly one, but I mostly left the berries whole. They will break down a little while baking, but I didn’t want a full jammy texture.
Making the Tarts
Now that your crust and filling is ready, it’s time for the fun part, putting it all together! Below are a few helpful tools for these:
- 4″ Tart Pans. Use pans with a removable bottom for easier removal. I also prefer a thin metal pan over a plastic one – they have a better final bake and it’s easier for trimming excess dough for a clean edge
- Straight Rolling Pin. This is my go-to style of rolling pin. I find the pins with the handles to be pretty awkward (and I always mush my fingers into the dough at some point!) and the tapered version is just more difficult to get an even layer.
- Rolling Guides. When making more delicate pastries, I like to bust out the rolling guides to ensure I have a nice even layer of thin dough. You set the one guide on either side of the dough, then once your rolling pin meets the guides, the dough will be nice and even. I used a square wooden dowel from a craft store for years, but eventually upgraded to a set of these silicone guides.
- 5-Wheel Pastry Cutter. I like to use this pastry cutter to ensure I have nice equal strips for the lattice. This is optional, a sharp knife and a steady hand do the trick too.
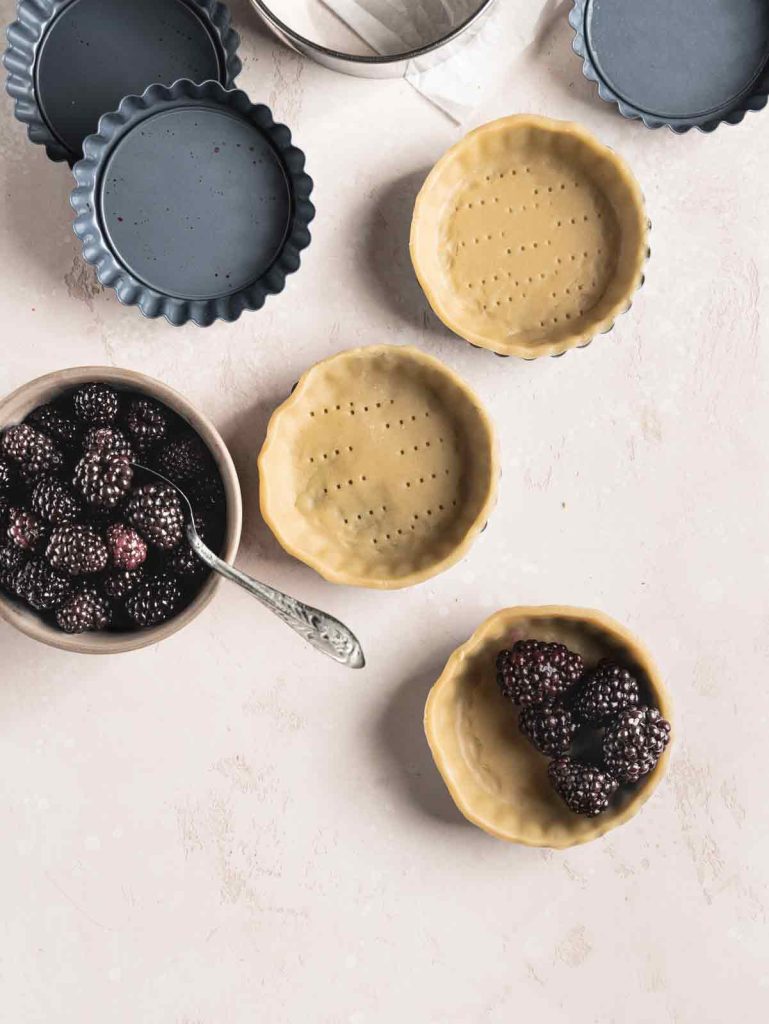
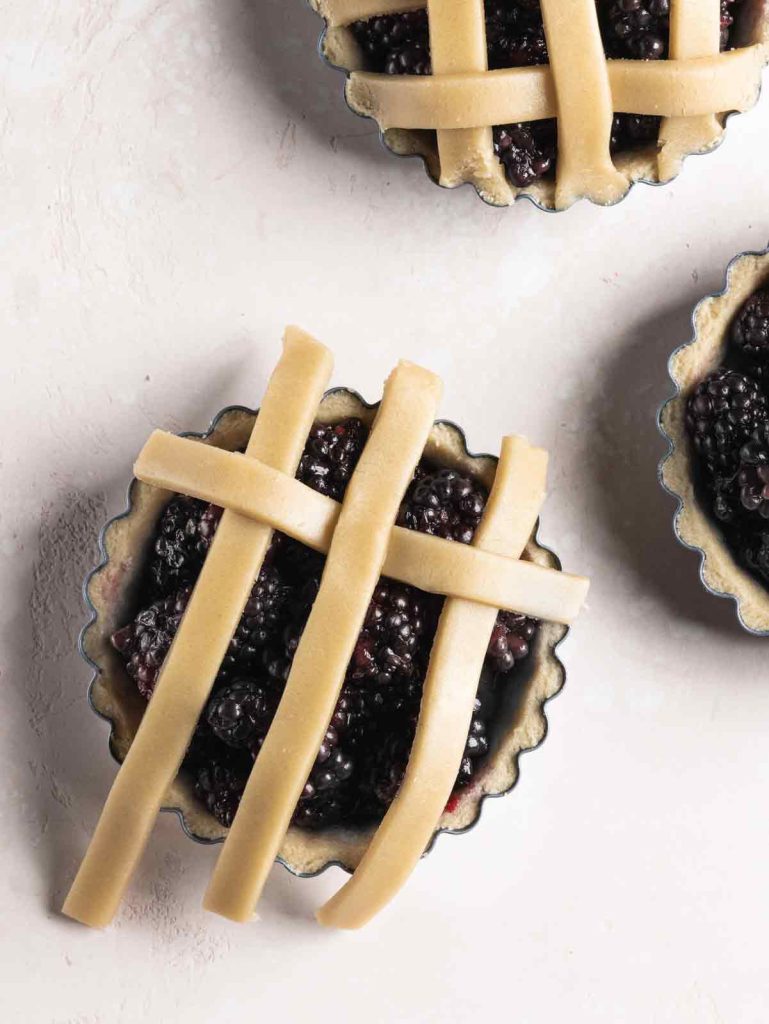
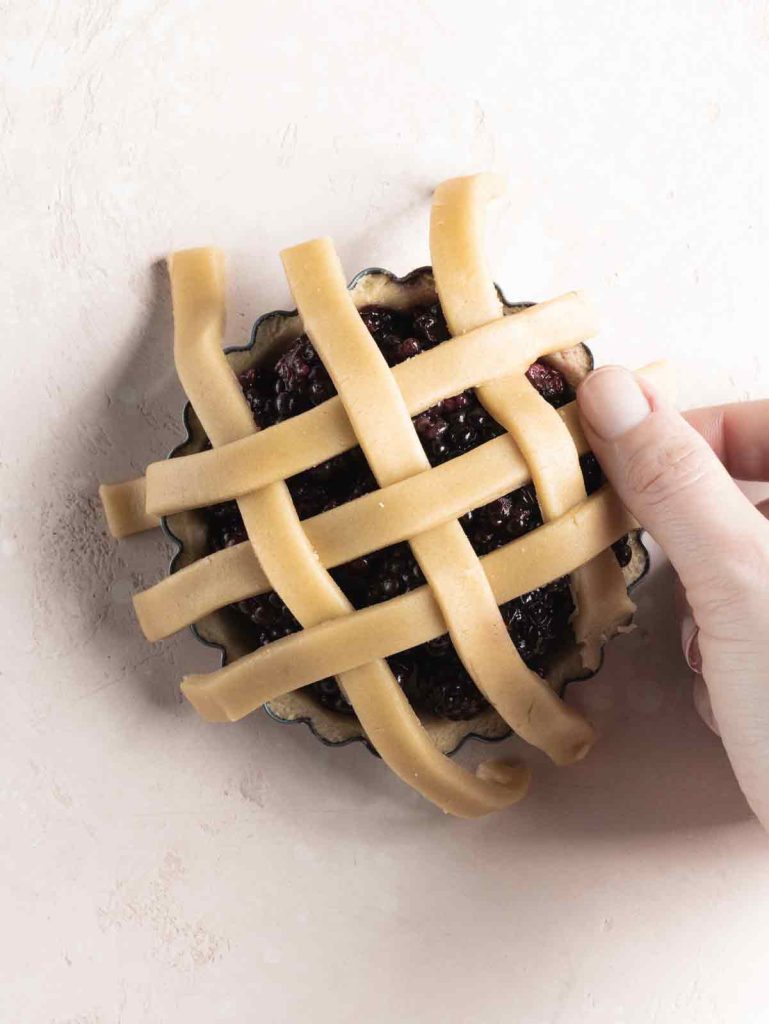
Lining and Baking the Tarts
Divide your dough in half, leaving 1/2 wrapped in the fridge. On a floured surface, roll half the dough into a 1/8″ thick layer. Using a cutter large enough to go up the sides of the shell, cut out 6 pieces of dough.
My tart shells are exactly 3 3/4″ wide, and I used a 4 1/2″ biscuit cutter. You can use a large cup or saucer as a guide, or really just eyeball the circle. As long as it’s larger than the shell, you can trim any excess away.
Set the dough inside the tart shell, and using your thumb, press the dough into the corners all around and up the sides of the shell. If you have any cracks, simply smoosh them back together, this is a very forgiving dough. Using a sharp knife, trim the dough right to the top of the pan.
This dough doesn’t shrink so no worries about trimming early! Dock the dough by piercing 10-12 times with the tines of a fork. This will allow the steam to escape and will prevent bottom from puffing up while baking.
Place the dough-lined shells on a sheet pan and cover lightly with plastic wrap and allow to chill for 15 minutes before the first bake. We will blind bake the shells first, or pre-bake without filling, to ensure we end up with a nice crisp crust. Once they are pre-baked, remove from the oven and allow to cool down before filling with blackberry mixture.
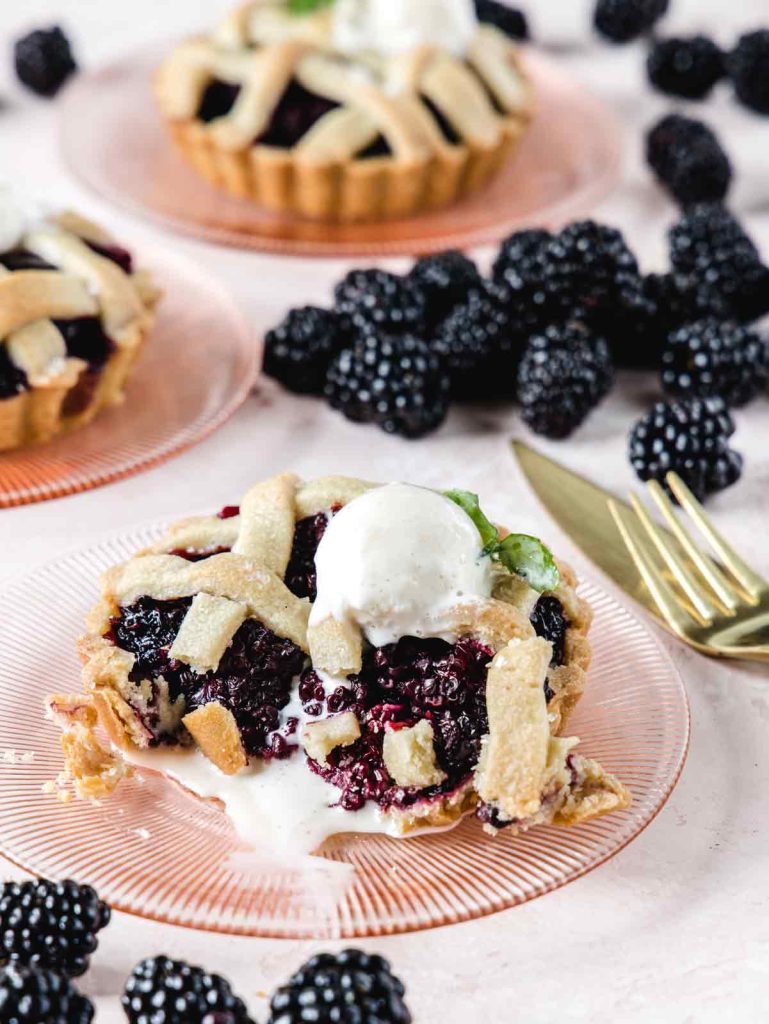
Making the Lattice
While the crusts are chilling and blind baking, remove the second half of the dough from the fridge and roll out into a 1/8″ thick layer. Using a pastry wheel or sharp knife, cut 1/2″ wide strips about 6″ long. Keep these covered with a sheet of plastic wrap until ready for use. You will need 18 strips in total.
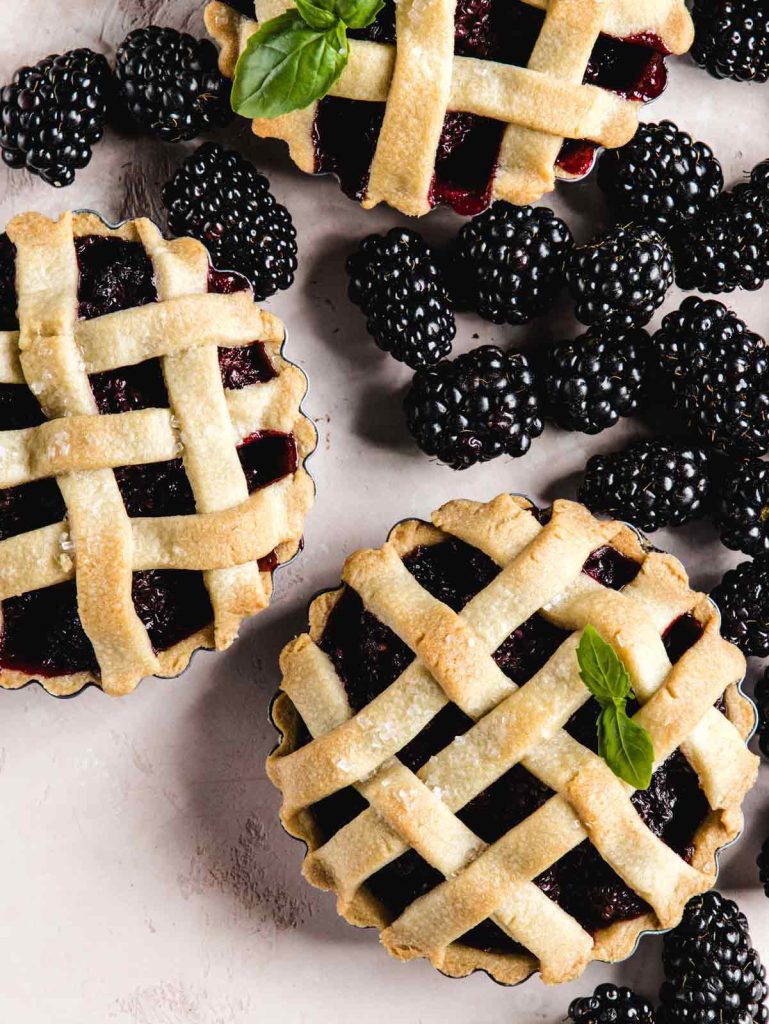
Once the pre-baked crusts are cool to the touch, fill each with about 1/2″ cup of filling. Place three strips horizontally across the top. The other three strips will be placed vertically, going over-under-over the horizontal strips.
Using your thumb, smoosh the strips at the pan edges into the bottom crust. This will seal the edges and trim the excess dough away on the edge of the pan. Sprinkle with coarse sugar and bake until the filling is lovely and bubbly and the top lattice is browned.
Frequently Asked Questions
Not at all! This is purely for prettiness and that is never a requirement in my book. Skip the lattice, they will still be beautiful and delicious. For something still special, cut out shapes with a cookie cutter and place on top before baking.
Your dough might a bit too cold. Try leaving at room temperature for a few minutes before returning to it.
The dough might be too warm. Wrap it back in plastic and set in the fridge for 15-20 minutes before trying to continue.
Totally! A softer berry, like a raspberry, will break down more while baking, but it’ll still be delicious. Slice larger berries, like strawberries, before making the mixture.
Looking for More Fruity Tarts and Pies?

Blackberry Tarts
Equipment
- 6 4" individual tart pans
Ingredients
Sweet Crust Dough
- 226 g unsalted butter room temperature
- 150 g granulated sugar
- 53 g light brown sugar packed
- 2 large eggs beaten, room temperature
- 1 teaspoon vanilla extract
- 510 g all-purpose flour
- 1 teaspoon salt
Blackberry Filling
- 680 g 24 ounces fresh or frozen blackberries (thawed if frozen)
- 150 g granulated sugar
- 1 ½ teaspoons cinnamon
- ¾ teaspoon ground nutmeg
- Zest of 1 lemon
- 1 ½ teaspoons fresh lemon juice
- 3 tablespoons cornstarch
- Coarse sugar for sprinkling
Instructions
- Making the crust dough. In the bowl of a food processor, combine butter and sugars. Blend until smooth. Add beaten eggs and vanilla extract until combined. Scrape down the sides of the bowl as needed with a rubber spatula. Add in flour and salt and pulse until dough form. Turn out onto a sheet of plastic wrap, form into a disc, wrap and chill for 30 minutes.226 g unsalted butter, 150 g granulated sugar, 53 g light brown sugar, 1 teaspoon salt, 2 large eggs, 1 teaspoon vanilla extract, 510 g all-purpose flour
- Blackberry filling. While dough is chilling, mix together all blackberry filling ingredients. Mash any larger berries with a fork, but keep mostly intact. Place in a sieve above a bowl to catch any juice. Set aside.680 g 24 ounces fresh or frozen blackberries (thawed if frozen), 150 g granulated sugar, 1 1/2 teaspoons cinnamon, 3/4 teaspoon ground nutmeg, Zest of 1 lemon, 1 1/2 teaspoons fresh lemon juice, 3 tablespoons cornstarch
- Making the crust shells. Preheat oven to 350°F. Once dough is chilled, divide the dough in two. Rewrap one half and place back in the fridge. Roll the other half out on a floured surface to a 1/8″ layer. Cut 6 circles wider than your individual tart pans. Using your thumb, press the dough into the corners and up the sides of the pans. Using a sharp knife, trim away any excess on the edges. Repeat for each tart pan. Using a fork, pierce the bottom of the dough 10+ times to allow steam to escape. Place the tart pans on a sheet tray, cover lightly with plastic wrap, and chill for 15 minutes. Once chilled, place sheet pan in oven and bake for 12 minutes. Remove and allow to cool to the touch.
- Making the lattice. While shells are baking, unwrap the second half of the dough, roll on a floured surface 1/8″ thick. Cut 1/2″ wide strips about 6″ long.
- Making the finished tarts. Once the pre-baked shells are cool to the touch, fill with 1/2 cup of blackberry filling, discarding any juice at the bottom. Place 3 strips horizontally across the top of the filling. Place 3 strips vertically, alternating weaving above and below the horizontal strips. With your thumb, press the strips into the bottom crust and pressing away any excess at the edge of the pan. Sprinkle the top with coarse sugar. Place sheet pan back in the oven, bake 35-40 minutes until filling is bubbling and lattice tops are browned.Coarse sugar
- Allow to cool to the touch before removing from tins. Serve as is or with vanilla ice cream or whipped cream if desired.
Notes
- Tart dough can be made ahead. After step 1, wrap the dough in plastic and place in a freezer-safe bag. Freeze for up to 3 months. Defrost in fridge overnight before ready to use.
- Tarts are best the day of. Keep leftover tarts uncovered at room temperature
Disclaimer: We test all recipes using the metric weights shown, we cannot guarantee outcomes when switching to US measurements.

