These Spiced Cherry-Berry Hand Pies are mini pockets of pie perfection is all the goodness of a traditional pie in a convenient hand-held pastry.
With a filling of both cherries and blueberries and a flaky crust packed with warm spices, you’ll be so glad these hand pies are now acceptable to eat any time of the day — perfect for breakfast, brunch, and afternoon snack, or a post-dinner dessert!
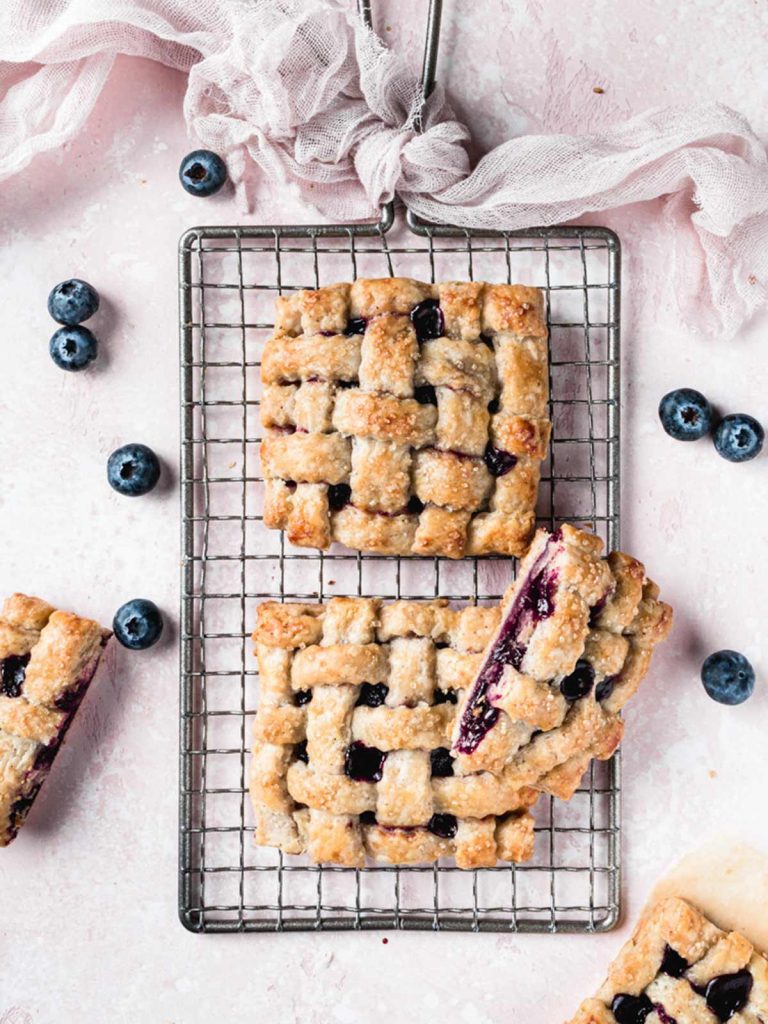
Are you like me and love pie, but find it just so gosh-darn difficult to eat while running errands or on the go? Welcome to the answer – the hand pie! Sure, whole pies are a ton of fun, like this Apple Cranberry Pie, but I’m also just a sucker for minis (take in point these mini Blackberry Tarts, too, I can’t help myself)
The Filling
These spiced cherry-berry hand pies may sound intimidating, but there are only two main components to this pastry, the filling and the crust.
The filling is so incredibly easy to whip up and, even better, because we are cooking the filling, fresh or frozen fruits work beautifully here.
If you are using fresh cherries, be sure to carefully pit each one before slicing in half. For frozen, I like to put them in the fridge the day before I’m making these to take some of the frozen chill off when slicing, but that’s really only to save my fingers from turning into icicles.
We are going to add a little cornstarch as the filling cooks to help thicken the juices. It’s important to take the extra step of mixing the cornstarch with a small amount of the juice before adding to the pot—creating this “slurry” (a cornstarch and liquid mixture) will prevent clumps of the starch from forming in the filling.
The Crust
The second component of this pastry is the crust. I know a lot of people are intimidated by pie crust, but it’s really not so bad if you have a little patience!
Cold ingredients is the key for a successful crust here, so pop your butter and shortening in the fridge the night before and make sure you have some ice on hand for that truly icy cold water.
We are using a combination of butter and shortening for this recipe. The butter is the flavor maker and the shortening helps crust to hold its shape, together they make a perfect crust.
Baking at a high heat helps to set the crust in place quickly so it doesn’t have the time to turn into melted butter puddle (we’ve all seen it, I’ve done it, you’ve done it, it’s not ideal – you want that butter in the pastry, not on your baking sheet!)
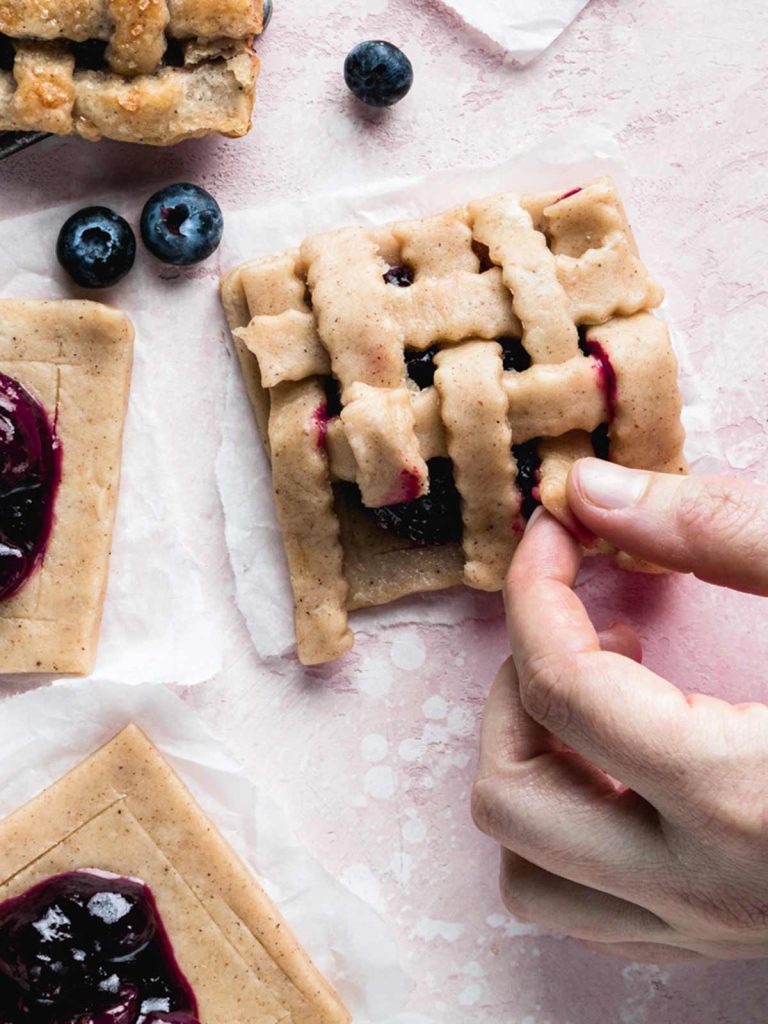
Lattice Tips & Tricks
The lattice top shown here is 100% positively optional. Sometimes I like a slightly fiddly project to keep my hands busy and my mind occupied, sometimes I just want a quick delicious pastry, it’s completely up to you. A full crust top with a few decorative slits is also a beautiful end result in the fraction of the time.
If you’d like to tackle this lattice work, here’s how to do it:
- Cut strips of dough about 1/2” wide and 4” long. I usually needed 9 strips per pastry.
- Egg wash the outer edges of your bottom crust and lay 5 strips of dough vertically, one next to another on top of the filling.
- Lift strips #2 and #4 and place a strip horizontally beneath as close to the top as possible. Replace strips #2 and #4 down.
- Lift strips #1, #3, and #5 and place another strip horizontally, and replace the vertical strips down.
- Repeat until you reach the bottom edge, trim any excess dough and press the edge tightly to seal.
This process sounds more difficult on paper than it does in action. When in doubt, just make it fun, it’s pie, it should be fun!
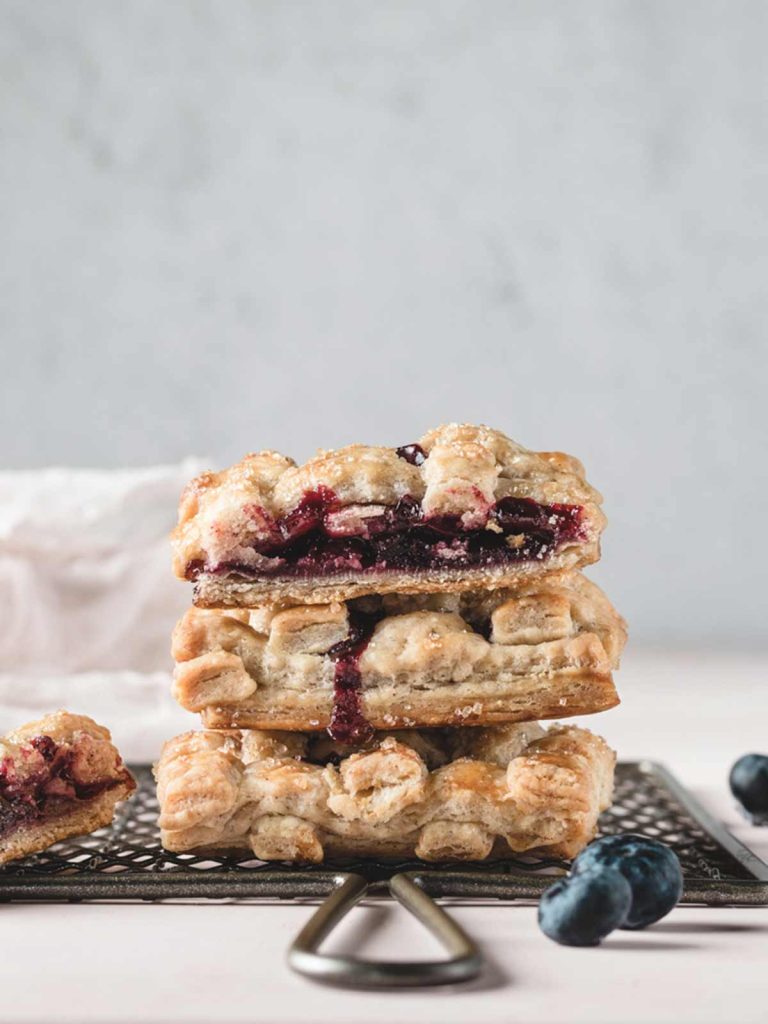
Helpful Equipment
Sometimes making your life easier is all about having the right tools for the job. Use what you have, none of these are a requirement, but after years of baking I’ve found some favorite tools to work with:
- Pastry Cutter for cutting in butter to pie dough without warming with your hands
- Rolling Guides are 1/8” thick silicone or square wooden dowels keep your dough an even thickness
- Pizza Cutter/Pastry Wheel is best for smooth, even cuts. A fluted wheel will give you those nice crinkly edges
- Ruler (Clean!) for measuring and as a guide for your pasty wheel for straight lines
- Small Pastry Brush for the egg wash
- Silicone Rolling Mat with Measurements prevents sticking to a wooden board and tells you the size of the dough as you work

Spiced Cherry-Berry Hand Pies
Ingredients
Pie Dough
- 360 g all-purpose flour
- 2 tablespoons granulated sugar
- 1 teaspoon salt
- 1 teaspoon cinnamon
- ½ teaspoon cardamom
- 113 g unsalted butter cold, cubed
- 138 g shortening cold, cubed
- ½ cup ice-cold water
Cherry-Berry Filling
- ½ pound cherries havled
- 95 g blueberries
- 50 g granulated sugar
- ½ teaspoon cinnamon
- ¼ teaspoon cardamom
- ¼ teaspoon salt
- 1 ½ teaspoons lemon juice fresh
- 2 ½ teaspoons cornstarch
- Egg wash 1 egg + 1 tablespoon water
- Turbinado Sugar for sprinkling
Instructions
- Pie Dough:Whisk together all dry ingredients.360 g all-purpose flour, 2 tablespoons granulated sugar, 1 teaspoon salt, 1 teaspoon cinnamon, 1/2 teaspoon cardamom
- Add cold butter and shortening, cut in using pastry cutter or fingers, until mixture becomes sandy with some pea-sized bits of butter/shortening remaining. If the butter begins to warm, place the bowl in the fridge for 10-15 minutes, then resume mixing.113 g unsalted butter, 138 g shortening
- To make ice water, fill a glass with water and ice, stir until water becomes icy cold, then measure 1/2 cup into a separate glass, straining out ice cubes.1/2 cup ice-cold water
- Slowly incorporate 1-2 tablespoons of water at a time to flour mixture. Mix with wooden spoon each time before adding more. Only add enough water to just bring the dough together. You may need a little more or a little less water than the 1/2c. so add slowly!
- Turn dough out onto a sheet of plastic wrap, knead a few times to bring dough together, form into a disc, wrap and chill for 1 hour.
- Cherry-Berry Filling:While pie dough is chilling make filling.
- Stir together cherries, blueberries, sugar, cinnamon, cardamom, salt and lemon juice in small saucepan.1/2 pound cherries, 95 g blueberries, 50 g granulated sugar, 1/2 teaspoon cinnamon, 1/4 teaspoon cardamom, 1/4 teaspoon salt, 1 1/2 teaspoons lemon juice
- Heat over medium-low heat until the sugar dissolves and the berries release juices, stirring occasionally. About 5-8 minutes.
- Remove 1 tablespoon of the juice and mix with cornstarch to create a slurry. Add slurry back into the saucepan and stir until fully incorporated.2 1/2 teaspoons cornstarch
- Allow mixture to simmer and thicken for approximately 5 minutes. Remove from heat and allow to cool completely.
- Making the Hand Pies:Preheat oven to 375°F, and line a baking sheet with parchment paper.
- Once the dough is chilled, divide dough into two equal halves. Place one half back into fridge while working, and place one on a lightly floured cutting board.
- Roll dough to roughly a 9″ x 9″ square. Using a pizza cutter or pastry wheel, cut dough into 9 – 3″ x 3″ squares. Place on baking sheet.
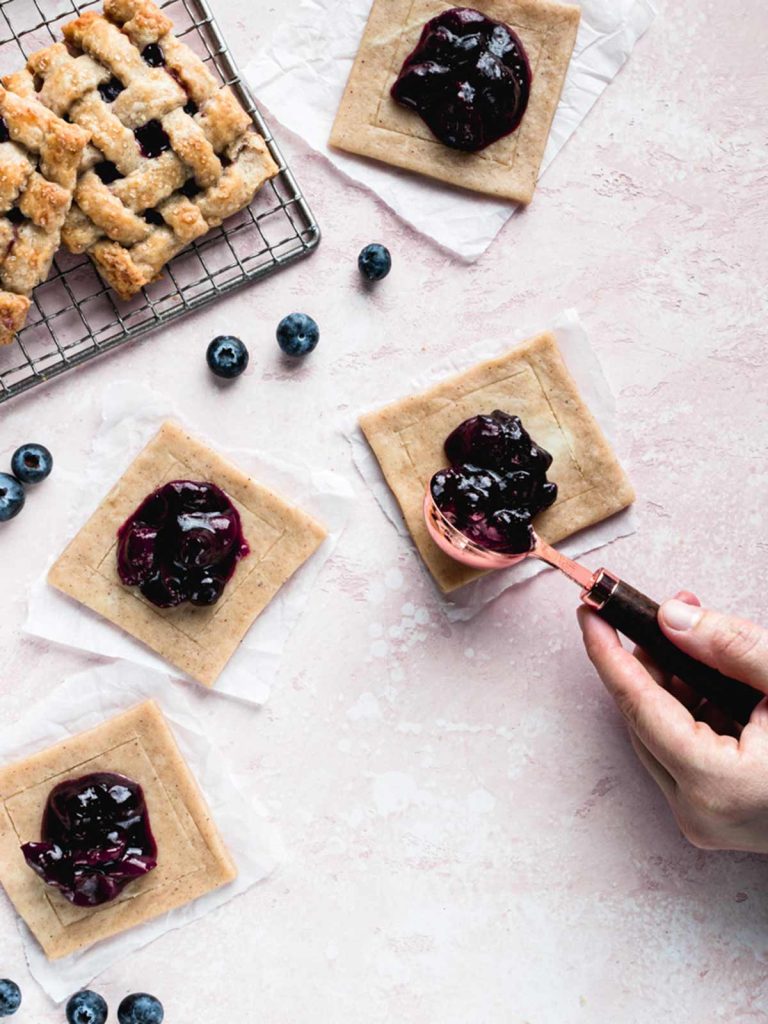
- Using a sharp knife, gently score dough about 1/2″ in from edges on all sides creating a slight barrier to hold the filling.
- Repeat the rolling and cutting with the second disc of dough to create 9 additional top halves.
- Fill each bottom half of dough with approximately 1 rounded tbsp. of filling. Egg wash the outer 1/2″ edge of the dough and top with second square.
- Carefully press all edges together to seal tightly and cut 3-4 slits on top to allow steam to escape.
- Alternately, to create lattice top – with second disc of dough, cut 1/2″ x 4″ strips and create woven criss cross pattern on top. Trim edges. Egg wash and seal as before. You may gather and re-roll scraps once to create additional strips.
- Once pies are formed, egg wash the top and sprinkle with turbinado sugar. You may need to chill for 10-15 minutes before baking if the dough has warmed while working.Egg wash, Turbinado Sugar for sprinkling
- Bake for 25-30 minutes until golden brown.
Notes
Disclaimer: We test all recipes using the metric weights shown, we cannot guarantee outcomes when switching to US measurements.

