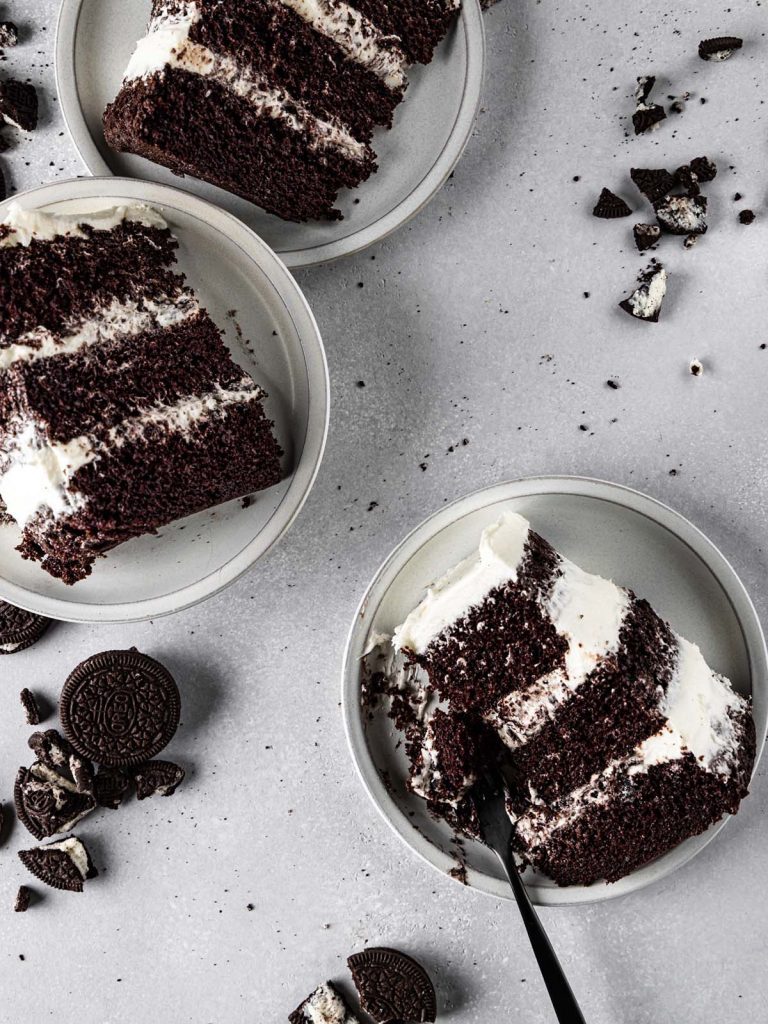
This Cookies and Creme Chocolate Cake has big, deeply chocolately layers of cake, with fluffy cookies and creme – cream cheese mousse filling. This mousse is a revelation, and it’s taken all of my very limited self control to stop eating spoonfuls before finishing the cake.
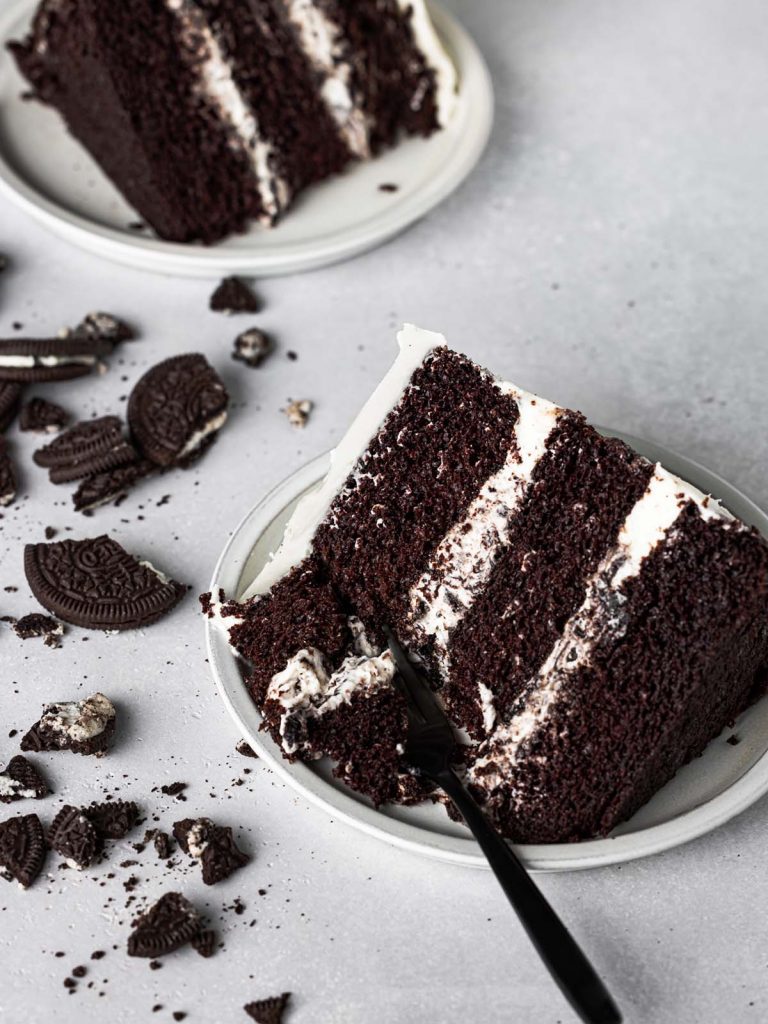
There are so few things in this world that bring as much joy as a classic chocolate sandwich cookie (insert brand name here – you know the one I’m talking about. It rhymes with Schmoreo). But you can’t just plop a bag of cookies on the table and call it a day with company.
Ok, you can, and I have – I’m not above it – but we’re in the business of baking around these parts. So I took those classic sandwich cookies and created an insanely delicious cake. Also check out these Oreo Stuffed Brownies because I legit cannot resist an Oreo.
Cookies and Creme Mousse
The showstopper of this cake is the filling. It’s a combo of a mousse and a cream cheese icing. It’s incredibly light and fluffy and filled with cookie bits. The mousse has a few basic parts. Cream cheese and powdered sugar is beaten together until light and airy.
Separately you have whipped cream. And, of course, a pile of cookies. But there is one other part to this – a little gelatin. I know that sounds intimidating.
But gelatin wants to be your friend and help you out, it wants nothing but the best for you. It’s how we avoid butter and creating that dense icing-like layer and get a silky and tangy mousse.
Making the Mousse
Don’t get scared about using the gelatin, I’m going to talk you through it. There’s small packages of powdered gelatin available in the baking aisle of all grocery stores, it’s readily accessible. Your grandma probably used it to make jello way back when.
We’re going to use a teeny amount for our mousse. We’re not going for the jiggle jiggle, or the wiggle wiggle, we just want the whipped cream base to keep it together long enough to eat the cake. Yes, you could leave the gelatin out completely, but you might notice the layers are not as stable for laying.
You need three bowls for this. First, place the gelatin in a small bowl. Heat the first amount of heavy cream until until boiling, and pour over the gelatin. Stir constantly until the gelatin is fully dissolved. This might take 5 or so minutes.
After 5 minutes, if the gelatin isn’t dissolved, reheat the mixture for a few seconds in the microwave, and keep stirring until fully dissolved. Once there, set aside until cooled to room temperature (do not refrigerate). I like to use this time to crush the sandwich cookies and start on the second bowl-the whipped cream.
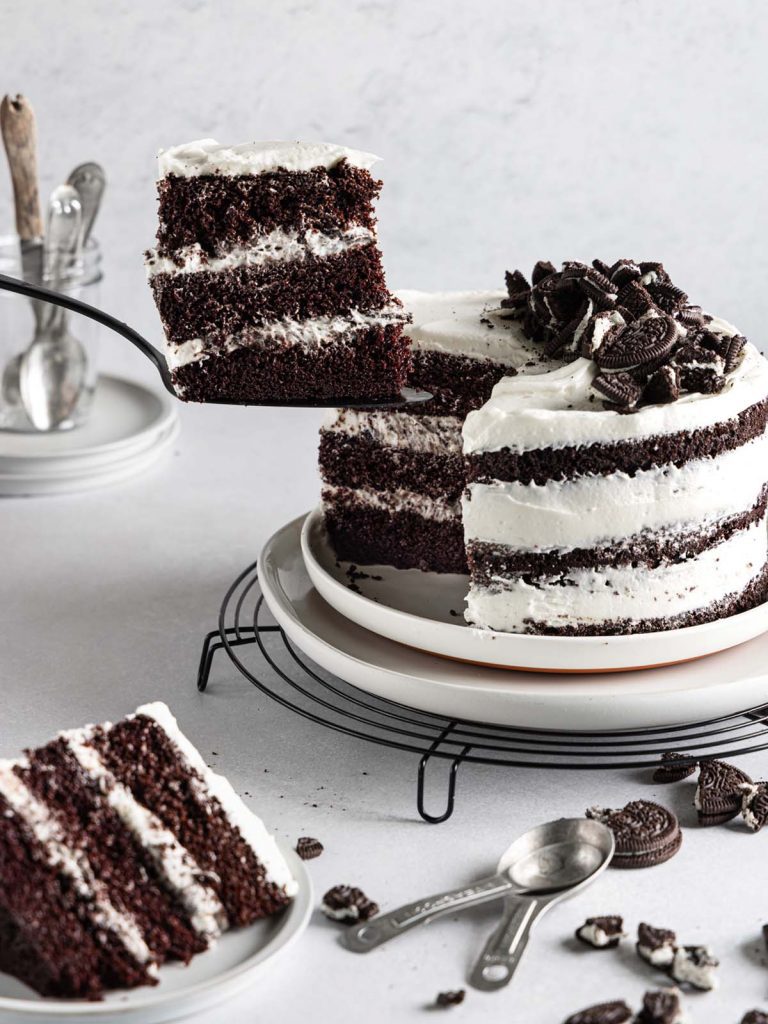
In your second bowl, pour the second amount of chilled heavy cream, and whip until you have stiff peaks. That means when you take the beaters out, the whipped cream stands up basically straight if you turn them over.
In the third bowl, beat together the cream cheese and powdered sugar. You’ll add the vanilla and salt and whip until you have a fluffy mixture. One suggestion – use the cheaper cream cheese brands. I usually get the store brand option. The “extra creamy” or “creamiest on the world” versions are great for bagels. But the creamier they are, the wetter they are.
And we don’t need any more wet in our lives. So, now that you’ve beaten your cheapy cream cheese into submission, your gelatin mixture should be room temperature and ready to go. Pour the mixture in with the cream cheese and mix until fully incorporated.
I know, I sound crazy. You’re saying, ‘lady, why are you pouring 1/2 cup of liquid into this, you’re creating the problem.’ But because it’s a gelatiny liquid, it’s a magic liquid. Trust in the process!
Putting the Mousse Together
Now, it’s time to mousse. You’ll take the whipped cream and add it into the cream cheese mixture. But. Go. Carefully. You want to preserve all the fluffiness of the whipped cream. We’re going to fold it in (any, Schitt’s Creek fans? You know what I’m talking about.)
Take about 1/4 of the whipped cream, and gently stir it into the cream cheese, this will lighten up the mixture. Then, about 1/4 at a time, add the whipped cream and with a rubber spatula, gently making a J-shaped motion to fold.
Place the spatula straight into the center, scoop down to the bowl’s edge pulling the stuff on the bottom to the top. Then rotate the bowl a quarter turn and repeat until the whipped cream is mostly incorporated. In, down, fold up, repeat. Once you get close to fully mixed, add the cookie bits and mix until everything is fully incorporated.
Refrigerate and let the gelatin do its magic for a few hours. It’s going to firm up and create a floofy delicious whipped filling that can hold up a cake layer. Ta-da!
Chocolate Cake
The cake layers are my basic chocolate cake recipe. And by basic, I mean it’s my absolute go-to anytime I make chocolate cake. It’s velvety, deeply chocolatey and filled with moist-makers like sour cream and brown sugar. No fancy equipment is needed, but there’s a few things I recommend.
Sift your dry ingredients – you don’t want a big patch of clumpy white flour. Also, the coffee is so important when working with chocolate. I promise, this isn’t a mocha cake, but the coffee intensifies the cocoa flavor. That’s how you get that deep, rich chocolate cake. The secret is out!
Whisk your dry ingredients in one bowl. Whisk the wet in another bowl. Add the wet to the dry. And then here’s the exciting part. Right at the end, you’ll add in hot coffee (or water, but seriously, see above, we just went over this). The hot coffee serves a few purposes. A. The lightens the final texture. B. The hot activates the cocoa and intensifies. C. It activates the baking powder. The batter will be thin, but the final flavor will be anything but.
Finishing the Cake
There’s one last component – the buttercream. This will be used as a dam to hold the mousse in place and for the top of the cake. A little butter, powdered sugar, whipped up nicely, you are ready to make this cookies and creme cake!
To create the layers, place the first cake layer on the base – leveling with a knife if needed. Next, I put the buttercream in a piping bag or ziplock bag and cut a hole in the corner. I pipe a ring around the inner edge of the cake layer.
It doesn’t need to be perfect or pretty, it’s going to simply keep the mousse inside the cake layers. Fill the buttercream ring with a generous amount of the mousse. Top with the next layer, and repeat the process. Top with the last cake layer and cover the top with the buttercream.
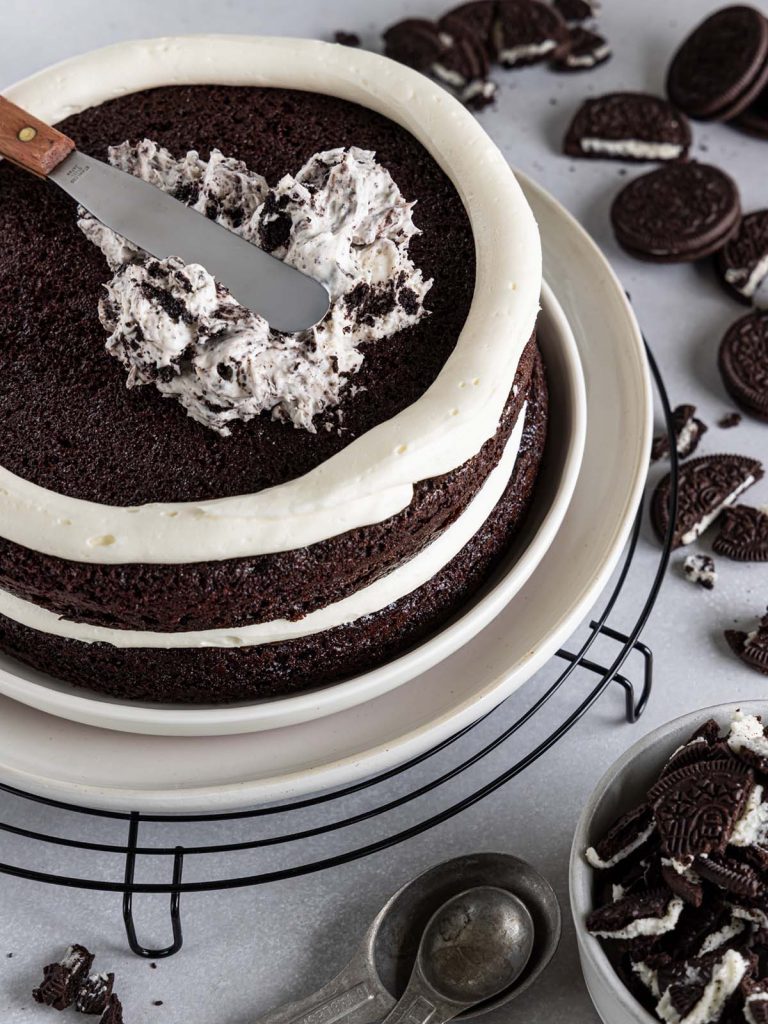
You could make extra buttercream and cover the sides, but I’m not that big on icing. Inside I left the cake edges naked and smoothed the buttercream with a bench scraper to create this semi-naked cake. Some crushed cookies on top completes the cake. You could get crazy with decorations, but really I prefer simple cakes. Putting a pile of stuff on top looks fun, but just get out of the way, I want cake.
Helpful Tools
- A Sifter is really needed, both for the powdered sugar in the icings, but also the dry ingredients in the cake. Clumpy ingredients are never good. This type of sifter is super easy and quick to use.
- A Bench Scraper like this – without a plastic handle – is a dream for cake decorating. You can place it right against the cake plate and get a straight line.
- Cake Strips are very helpful for creating straight, flat layers. You soak these in water and wrap the outside of the pan. This helps to dispense the heat evenly and you avoid that middle bump.
- Piping Bags are fantastic for creating easy piped borders.
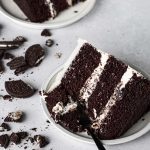
Cookies & Creme Chocolate Cake
Equipment
- 3 8" cake tins
Ingredients
Cookies and Creme Cheese Mousse
- 1 teaspoon powdered gelatin
- ½ cup heavy cream
- 1 ½ cups heavy cream very cold
- 227 g cream cheese 1 package
- 227 g confectioners' sugar sifted
- 2 teaspoon vanilla extract
- 1 teaspoon salt
- 1 ½ cups crushed cookies filling removed (about 18 sandwich cookies)
Chocolate Cake
- 220 g all-purpose flour
- 65 g natural cocoa powder
- 250 g granulated sugar
- 55 g packed brown sugar
- 2 teaspoons baking soda
- 1 ¼ teaspoon baking powder
- 1 teaspoons salt
- 1 teaspoons espresso powder optional
- ½ cup canola oil
- 2 large eggs whole, room temperature
- 1 egg yolk room temperature
- 150 g sour cream room temperature
- ½ cup buttermilk room temperature
- 2 teaspoons vanilla extract
- ½ cup hot coffee or hot water
Vanilla Buttercream
- 226 g unsalted butter room temperature
- 400 g confectioners' sugar sifted
- 1 to 2 tablespoons heavy cream
- 1 teaspoon vanilla extract
- ¼ teaspoon salt
Instructions
- Cookies and Creme Cheese Mousse:Place powdered gelatin in a small bowl. Heat 1/2 cup of heavy cream until just boiling and pour over gelatin. Stir continuously until the gelatin is fully melted and absorbed, about 5 minutes. If after 5 minutes, the gelatin still isn't fully melted, you can reheat the mixture briefly in the microwave for a few seconds and continue stirring. Set aside on counter until room temperature.1 teaspoon powdered gelatin, 1/2 cup heavy cream
- In a large second bowl, place the other 1 1/2 cups of cold heavy cream and whip until stiff peaks form.1 1/2 cups heavy cream
- In the bowl of a stand mixer, beat cream cheese until airy, add confectioners' sugar and beat until fluffy. Add vanilla and salt. Scraping down sides as needed.227 g cream cheese, 227 g confectioners' sugar, 2 teaspoon vanilla extract, 1 teaspoon salt
- Once gelatin mixture is cooled completely, add to cream cheese and mix until fully incorporated.
- Gently fold the whipped cream into the cream cheese mixture, a little at a time, keeping as much of the air of the whipped cream in tact.
- Once the whipped cream is nearly incorporated, add the crushed cookie pieces and finish mixing.1 1/2 cups crushed cookies
- Cover and let chill in the refrigerator for at least 3 hours or overnight.
- Chocolate Cake:Preheat oven to 350ºF. Grease and line 3 – 8" cake pans.
- In a large bowl, sift together dry ingredients.220 g all-purpose flour, 65 g natural cocoa powder, 250 g granulated sugar, 55 g packed brown sugar, 2 teaspoons baking soda, 1 1/4 teaspoon baking powder, 1 teaspoons salt, 1 teaspoons espresso powder
- In a second bowl, whisk together oil, eggs, sour cream, buttermilk and vanilla.1/2 cup canola oil, 2 large eggs, 1 egg yolk, 150 g sour cream, 1/2 cup buttermilk, 2 teaspoons vanilla extract
- Pour wet ingredients into the dry and whisk together.
- Add hot coffee and whisk until fully incorporated. Batter will be thin.1/2 cup hot coffee
- Divide evenly between the 3 pans, and bake for 22-24 minutes. Until a toothpick comes out clean and cake bounces back when touched.
- Leave to cool in tins for 10 minutes before turning layer out onto cooling rack. Leave to cool completely.
- Vanilla Buttercream:Whip butter in bowl of a stand mixer until light and fluffy. Slowly add the confectioners' sugar until fully incorporated. Scraping down sides as needed.226 g unsalted butter, 400 g confectioners' sugar
- Add heavy cream, vanilla and salt and whip until fully mixed. More heavy cream will create a thinner buttercream.1 to 2 tablespoons heavy cream, 1 teaspoon vanilla extract, 1/4 teaspoon salt
- Assembly:Transfer buttercream into piping or ziplock bag, trim corner to 1/2" wide hole.
- Place first cake layer on base, trim to level if necessary. Pipe a border of buttercream around the outer edge of the cake layer.
- Fill the inside with a generous amount of the mousse.
- Repeat with second layer.
- Top with final cake layer.
- Smooth final layer of buttercream on top. Smooth edges of buttercream using a bench scraper or butter knife.
- Top with additional crushed cookies if desired.
Notes
- Mousse can be made a day in advance. Leave covered in fridge. Cookies will soften over time.
- Cake layers can be made a day in advance. Wrap tightly in plastic wrap.
Disclaimer: We test all recipes using the metric weights shown, we cannot guarantee outcomes when switching to US measurements.
Looking for other Indulgent Chocolate Desserts?
Try these:


Im in heaven, cookies and creme mousse sounds to die for. I can’t wait to try!