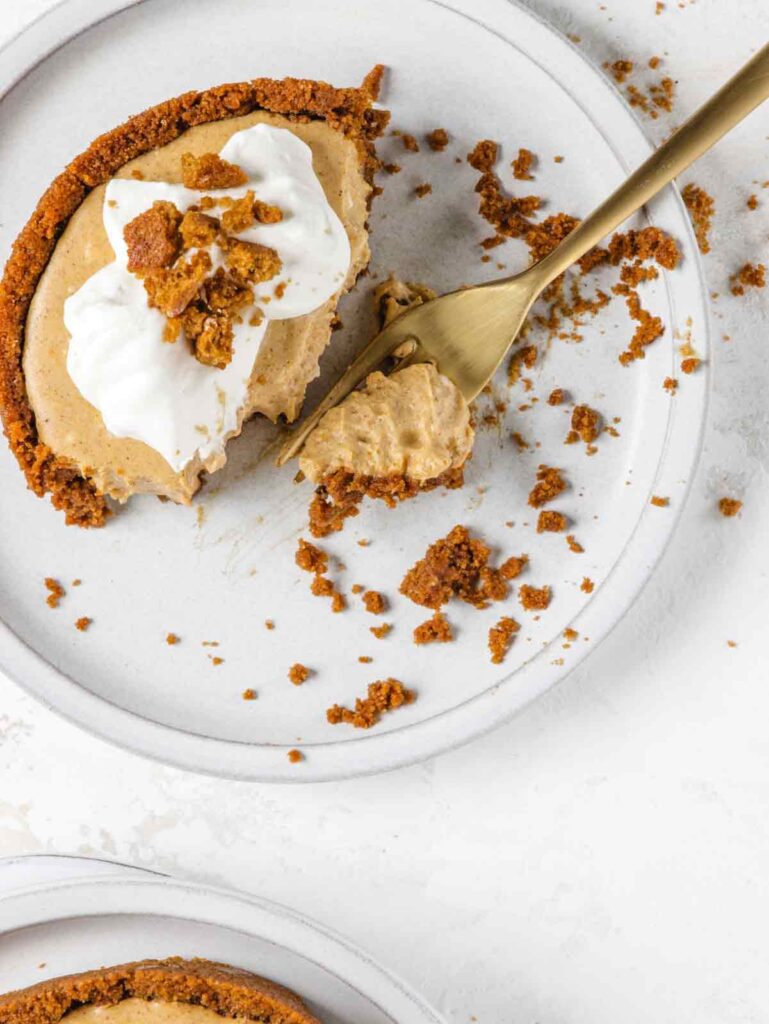
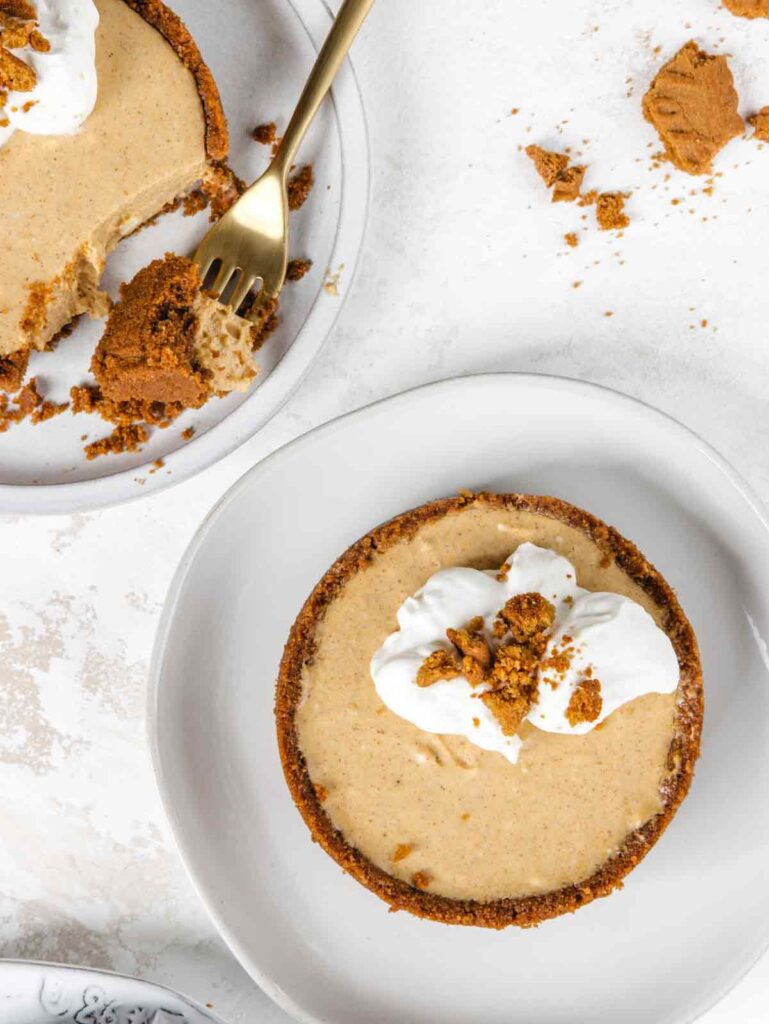
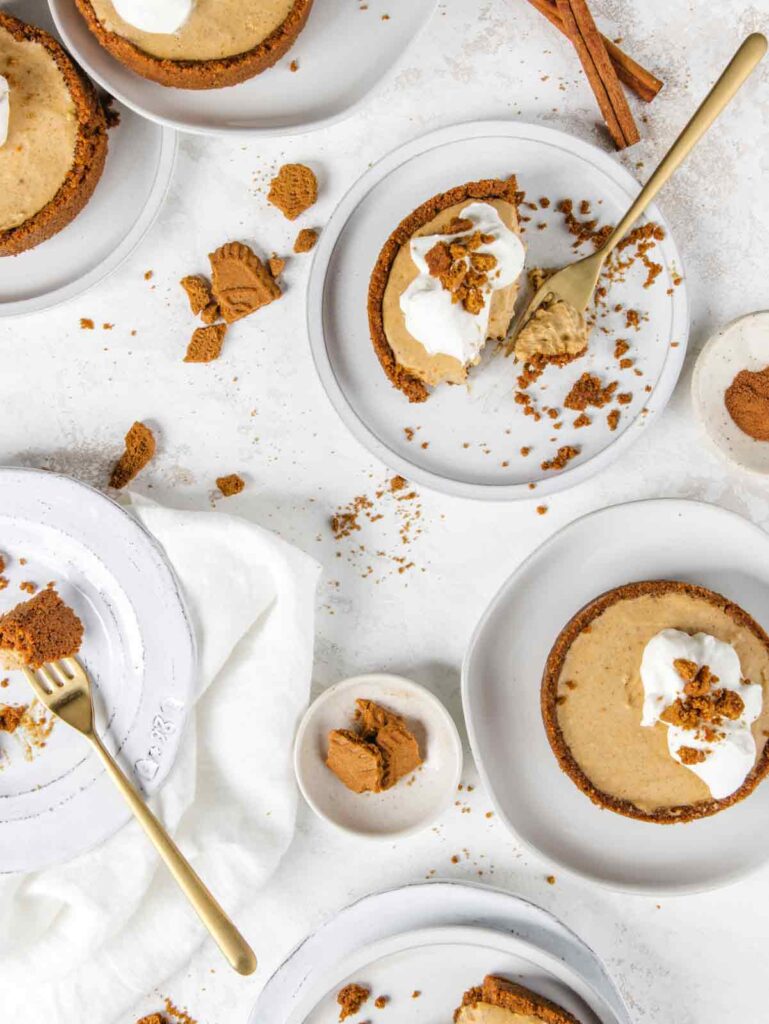
An easy version of a notoriously finicky dessert, these mini pumpkin cheesecakes require no ovens, no water baths and no frustration! A silky pumpkin and cream cheese filling is paired perfectly with a spiced Biscoff cookie crust. The mini size of these makes them great for holidays and parties!
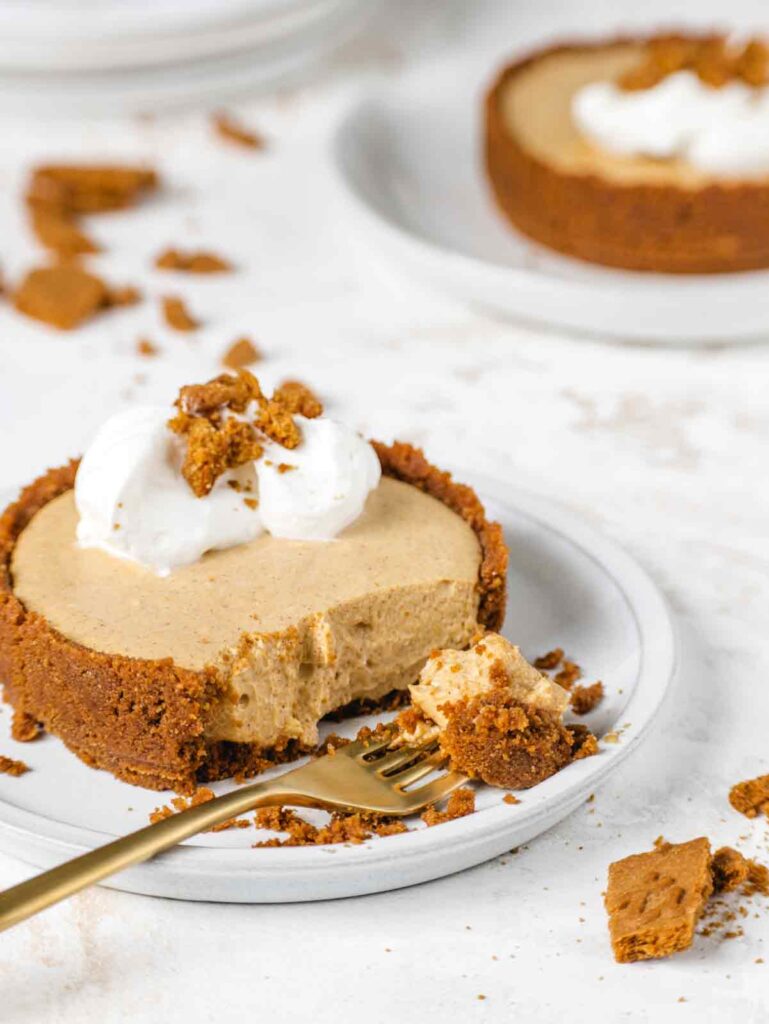
As classic as pumpkin pie for Thanksgiving, pumpkin cheesecake is an unsung hero of the holidays. There are some flavors that just sing together and these cheesecakes are no exception. Pumpkin, cream cheese and cinnamon, just yes.
What Makes these Cheesecakes Great?
- No Bake Cheesecake: This cheesecake is set fully in the fridge, no oven required!
- Biscoff Crust: Elevating the traditional graham cracker crust, this Biscoff cookie crust adds an extra level of spice that balances beautifully with the pumpkin filling.
- Individual Sizes: Made in a mini 4″ springform pan, these little pumpkin cheesecakes are the perfect size for 1 at a dinner party.
- Creamy Pumpkin Filling: A filling made with pureed pumpkin, cream cheese, whipped cream and, of course, those autumnal warm spices. It has that needed creamy tanginess of a cheesecake with the flavor of pumpkin.
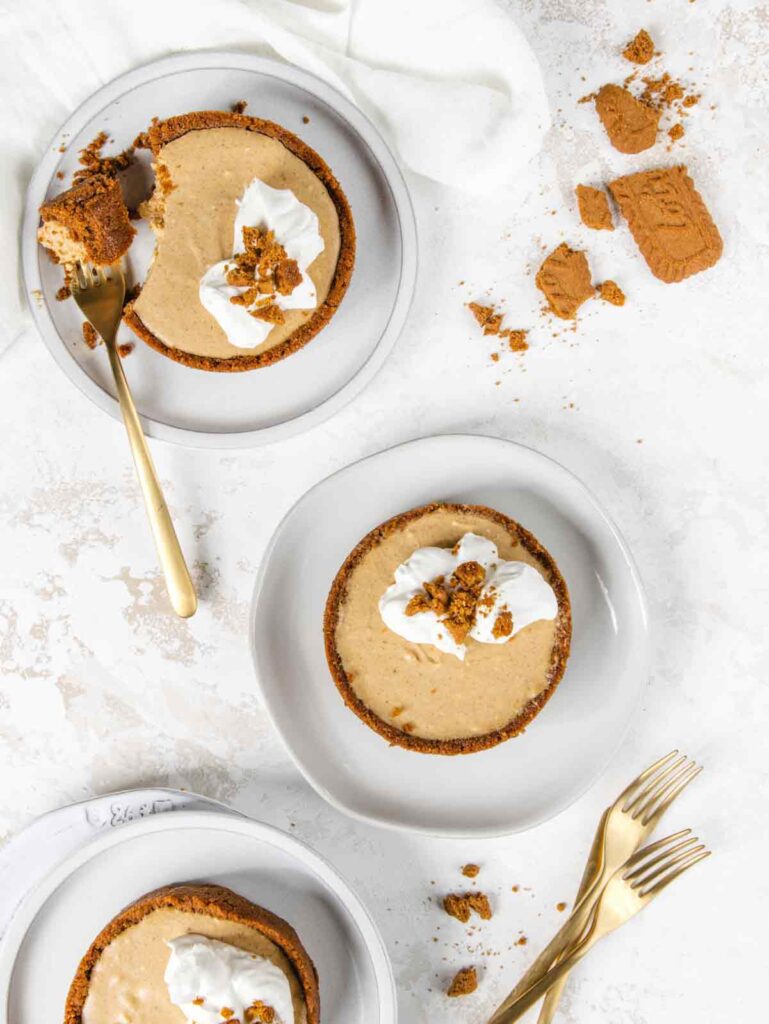
Making Individual Cheesecakes
These individual pumpkin cheesecakes only require 3 components: a cookie crust, and a pumpkin filling, and a 4″ springform pan.
Mini springform pans are easily found online if you don’t have a speciality baking store near you. I love them for individual desserts and savory items of all kinds, like quiches, topped cakes, and tiramisus.
If you don’t have the mini-sized pans on hand, you can absolutely make this in a standard 9″ pan. You will need to double the filling recipe in order to accommodate the larger pan, but the crust recipe can remain as written.

Making the Crusts
This crust comes together in a snap. Starting with Biscoff cookies means we’re starting with a flavor base. Blitz the cookies in a food processor into a fine crumb.
Next, whisk in a few additional spices – cinnamon, ginger and salt – and brown sugar to really make the crust have that a lot of great spiced flavor contrast to the filling.
Stir in the melted butter. The texture should resemble wet (not soggy) sand. When you press the crumbs, they should hold together.
How to Set the Crusts
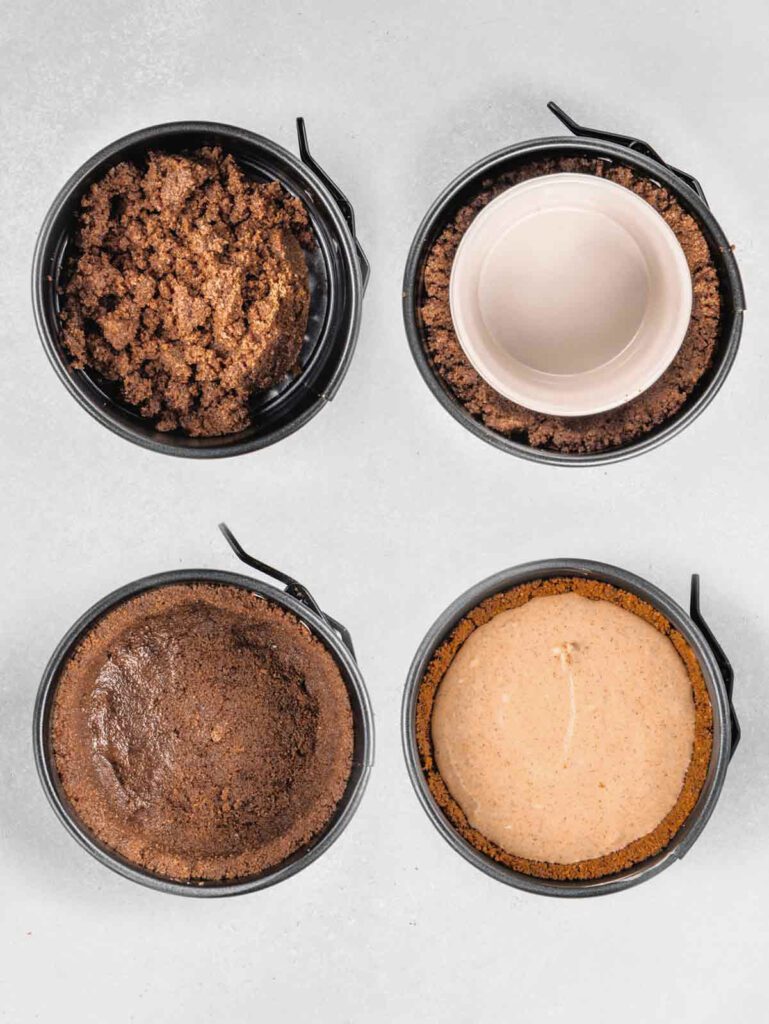
- Divide the crumb mixture between the 4 mini springform pans, about 1/2 cup in each. There is no need to line or grease the pans.
- Using your fingers, press the crumbs into the bottom of the pan and about 1″ up the sides of the pan.
- Use a straight-sided cup or ramekin to press into the corner of the pan to make a sharp edge all around.
- Repeat on all pans and place in freezer while making the filling to set.
A No-Bake Filling
A traditional cheesecake uses eggs to set the filling in a slow baking process. In our no-bake pumpkin cheesecake version, we will replace the eggs with gelatin to help our filling set.
I tested this recipe with just whipped cream and cream cheese as the base, but I found it was too much like a mousse, and not a cheesecake. It was delicious, but not quite cheesecake.
The answer was to reduce the amount of whipped cream adding fluffiness, and to use gelatin to provide that more creamy cheesecake texture.
Gelatin can be a bit intimidating if you haven’t used it, but it’s really just there to help! It’s a friend, not a foe!
Without the gelatin, the filling was a bit runny and didn’t hold well for slicing. A little gelatin goes a long way, it gives the final cheesecake a little stability.
Working the Gelatin
Powdered gelatin is easy to find at most grocery stores in the baking aisle. Look for a little cardboard box!
The first step to using gelatin is to “bloom” it in water. I know, it’s sounds counterintuitive to use water when trying to make something less runny. But without first dissolving the powdered gelatin, you will need up with a clumpy filling.
Sprinkle the gelatin over a small amount of water and let sit while you prepare the remaining ingredients. This is called “blooming” and basically hydrates the powder.
Preparing the Pumpkin Filling
In a small bowl, whip heavy cream to stiff peaks, so if you lift the whisk, the cream stands up on its own. Set aside while preparing the pumpkin mixture.
In a second bowl, whip very soft cream cheese until very creamy. It’s important to use very soft cream cheese to avoid clumps in the filling.
Add in the sugars, pumpkin and spices and mix until well combined.
Now that the gelatin has had a chance to “bloom” for a few minutes, give the gelatin and water a quick heat in the microwave, about 10-15 seconds on low heat, to fully dissolve the powder. Add it to the pumpkin mixture and thoroughly mix.
Gently fold the whipped cream into the pumpkin mixture by hand. Try to keep as much of the air in tact.
Fill the cold crusts to the top with the filling and chill in the fridge for at least 3 hours, or overnight.
Frequently Asked Questions
Yes! Keep the crust amount and process the same. Double the amount of filling to compensate for the larger volume.
A springform is the easiest way to remove the cheesecake. But I was successful in using a small traditional cake pan or cupcake pan and lining with strips of parchment. Crisscross 2 lengths of parchment longer than the length of the pan. Creating an “X” with handles to lift the cheesecake out.
Yes, you can substitute your favorite crispy/crumbly cookie. Graham crackers or ginger snaps work well!
The cream cheese needs to be very soft and room temperature and whipped very well before adding the other ingredients. If you end up with clumps, it will only affect the appearance, still delicious!
The powdered gelatin needs a bit of water to first rehydrate the gelatin. Once the gelatin is dissolved in the water, it will mix evenly into the filling, no clumping. The gelatin will set the small amount of water used.
The filling will still come together and taste delicious, but it will not be as set. It will be closer to a pudding than a cheesecake.
Mini Pumpkin Cheesecake
Equipment
- 4 4" springform pans
Ingredients
Cookie Crust
- 215 g Biscoff cookie crumbs about 30 cookies
- 2 tablespoons brown sugar
- 1 teaspoon ground cinnamon
- ½ teaspoon ground ginger
- ½ teaspoon salt
- 85 g unsalted butter, melted
Pumpkin Cheesecake Filling
- 1 teaspoon powdered gelatin
- 2 tablespoons water
- ⅓ cup heavy whipping cream
- 227 g cream cheese softened
- 3 tablespoons brown sugar
- 2 tablespoons granulated sugar
- 187 g pure pumpkin puree not pumpkin pie filling
- 1 teaspoon vanilla extract
- 1 ½ teaspoons ground cinnamon
- ½ teaspoon ground ginger
- ¼ teaspoon ground nutmeg
- ⅛ teaspoon ground cloves
- Pinch allspice
- ¼ teaspoon salt
- Additional crushed cookies, sweetened whipped cream for topping optional
Instructions
- Cookie Crust: Whisk together cookie crumbs, sugar, and spices. Stir in melted butter. Divide crumb mixture between 4 – 4″ springform pans, about 1/2 cup in each. Press crumbs tightly on bottom and 1″ up the sides. Use a straight ramekin or cup to press corners. Place in freezer while preparing filling.215 g Biscoff cookie crumbs, 2 tablespoons brown sugar, 1 teaspoon ground cinnamon, 1/2 teaspoon ground ginger, 1/2 teaspoon salt, 85 g unsalted butter, melted
- Cheesecake Filling: In a small, microwave-safe bowl, sprinkle powdered gelatin over water. Set aside while preparing remaining filling.1 teaspoon powdered gelatin, 2 tablespoons water
- In a small bowl, whip heavy cream until stiff peaks form, set aside.1/3 cup heavy whipping cream
- In the bowl of a stand-mixer fitted with paddle attachment, or with a hand mixer, whip cream cheese until smooth and silky, scrape down sides of bowl as needed.227 g cream cheese
- Add sugars, pumpkin, vanilla and spices, whip until fully combined.3 tablespoons brown sugar, 2 tablespoons granulated sugar, 187 g pure pumpkin puree, 1 teaspoon vanilla extract, 1 1/2 teaspoons ground cinnamon, 1/2 teaspoon ground ginger, 1/4 teaspoon ground nutmeg, 1/8 teaspoon ground cloves, Pinch allspice, 1/4 teaspoon salt
- Microwave gelatin and water mixture just until the gelatin dissolves, about 10-15 seconds on LOW.
- Stir gelatin into pumpkin mixture.
- Gently fold in whipped cream by hand, careful not to deflate the air. Fill prepared crusts to the top with the pumpkin cheesecake filling.
- Refrigerate at least 3 hours or overnight (best). Top with sweetened whipped cream and crush cookies if desired.Additional crushed cookies, sweetened whipped cream for topping
Notes
- 2 1/2 teaspoons of pumpkin pie spice can be substituted for spices in cheesecake filling
- Crust may be made ahead of time. Wrap, unfilled, and freeze until ready for use
- Cheesecakes can be stored in fridge for up to two days covered
Disclaimer: We test all recipes using the metric weights shown, we cannot guarantee outcomes when switching to US measurements.

